To set your gravatar, do the following:
Step 1: Go to https://ykyz.com/dashboard
Step 2: Scroll down, and click on the “gravatar” link.

Step 3: Click the blue “Create Your Own Gravatar” button.

Step 4: Sign in, or sign up for a wordpress account.
Note: The email used for the wordpress account should make the one used for the ykyz site account. The gravatar will be attached to this email.
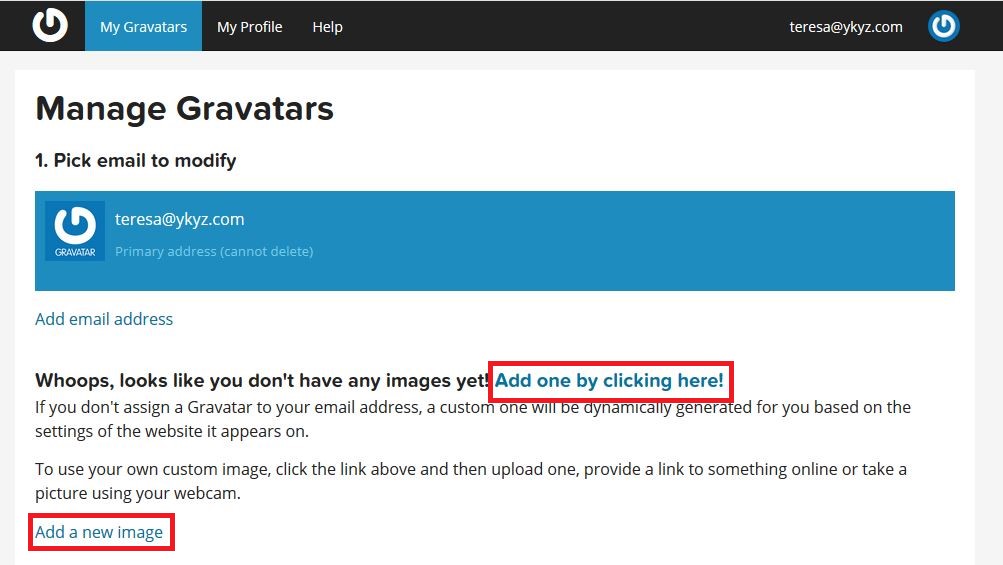
Step 5: Click on the “My Gravatars” Tab located at the top of the page.

Step 6: Click on the “Add New Image” link.

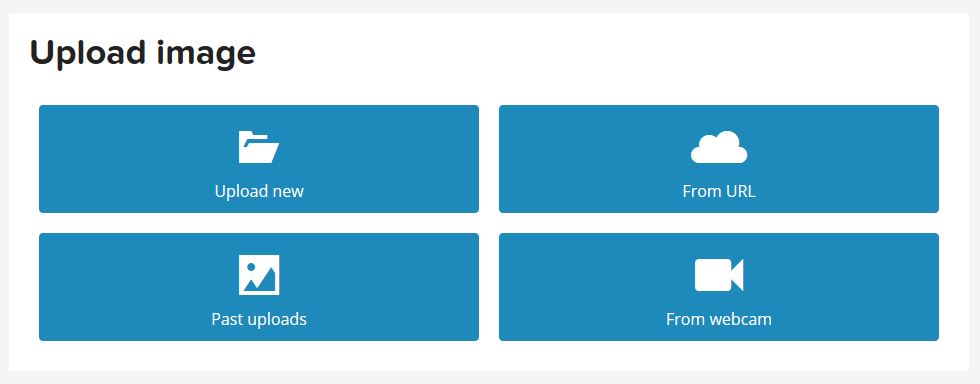
Step 7: Click on the blue “Upload New” option.

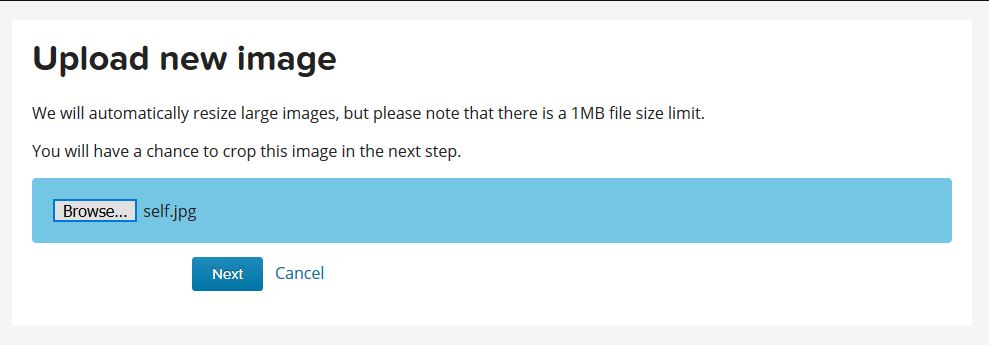
Step 8: Click the “Browse” button. Select your desired file to upload. Then click the blue “Next” button.

Step 9: Follow the instructions provided to crop image if needed. Once completed, click the blue “Crop Image” button.

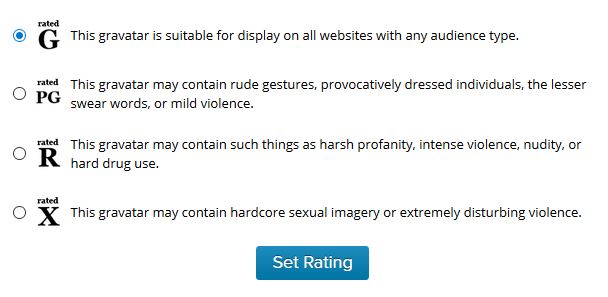
Step 10: Select the appropriate rating for your gravatar. Then click the blue “Set Rating” button.

Step 11: You should end up on a page with the title “Manage Gravatars.” This is the final page of the set up process.
(This is also the page you use if you want to change the gravatar image later on.)

Your gravatar should now be set. It may take a few minutes to see the changes reflected on the ykyz site.